
After taking a short break from the CWC+ courses, I believe it’s time to use what I’ve learned so far to embark on my own app journey.
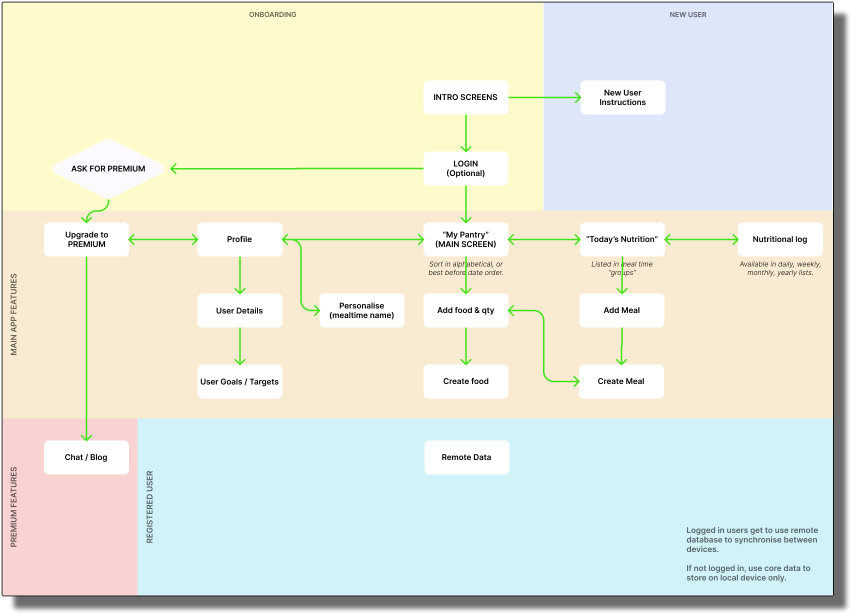
Implementing some of what JC took us through in the Journey Mapping lesson of Module 5 of the CWC+ Design Course, today I looked at creating my own ‘Journey Map’. I’ve used a “top down” approach more familiar with flowcharts than the “left-right” method we saw during the lesson, but only because that’s what comes more naturally to me.
At the moment, the Journey Map is little more than my thoughts about what screens / views the apps will require. This way I’ll be able to focus down on a single view at a time, rather than trying to imagine the whole app as a completed entity.
When coding / programming in the past, I’ve generally gone with a more holistic approach – envisaging everything the finish product needs to do, throwing up some basic code to make it all work as quickly as possible, and then tweaking and modifying it forever more.
That’s not going to work for App Development. For App Development, a “finished product” will be required for submission to the App Store. The “finished product” will need to be polished and bug-free. The best way to achieve this will be to focus on a limited number of tasks for the app, and ensure that they work well for the user. After that, updates and upgrades can be added.
If I focus on the end goal of the App, with all of its features, then it’ll probably never get completed or submitted to the App Store.
So, I start with ‘baby steps’. Get the App into a usable form first and foremost, and only look at additional / enhanced features after the basic version is ready and usable.
Next up – wireframing …


