
After learning many concepts and processes the SwiftUI Views Specialist Course from Big Mountain Studio, I thought it appropriate to put the lessons into practice.
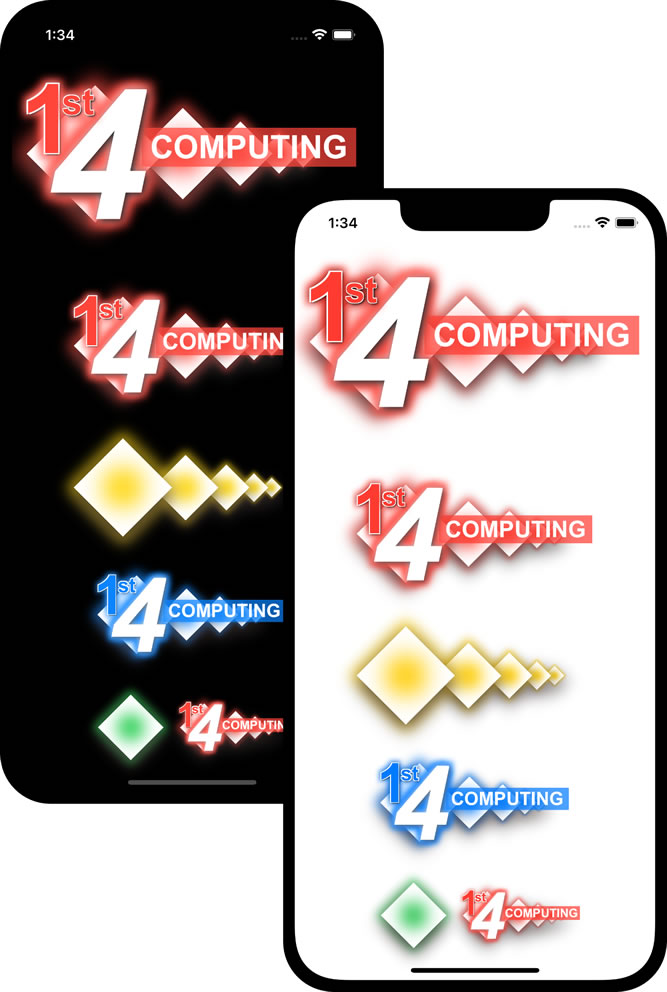
I elected to try to recreate my old 1st4computing logo in SwiftUI, using only code.
I’ve used SwiftUI sub-views for each separate component of the logo, so I can call up any element in isolation for use elsewhere in the app design.
There’s a sub-view for the rotated square, a sub-view for five rotated squares in a line (each calling a different size view of the rotated square); there’s a sub-view for the “COMPUTING” over the red rectangle, and separate views for the ‘1’ and ‘st’.
There is then a single combining view that brings everything together, spaced appropriately, to complete the logo. This logo can then be called using just Logo1st4computing().
Logo1st4computing()In addition, I’ve added parameters so that the logo can be scaled. And, as unlikely as it might be, to be presented in a different colour. To produce a green version of the logo at half standard size, it’s simply a matter of calling up this:
Logo1st4computing(scale: 0.5, colour: .green)The view to assemble the logo from its component parts is as simple as this:
struct Logo1st4computing: View {
    var scale: CGFloat = 1
    var colour = Color.red
    var body: some View {
        ZStack {
            Diamonds(scale: scale, colour: colour)
            ZStack {
                TextComputing(scale: scale, colour: colour)
                    .offset(x: scale * 44, y: scale * -5)
                TextGiant4(scale: scale, colour: colour)
                    .offset(x: scale * -74, y: scale * 2)
                TextGiant1(scale: scale, colour: colour)
                    .offset(x: scale * -112, y: scale * -26)
                TextST(scale: scale, colour: colour)
                    .offset(x: scale * -88, y: scale * -40)
            }
        }
    }
}
It would be easy to change the logo around, should it be required, just by calling the elements/components in a different order or with different offsets.
I don’t know that I’ll ever use this old logo going forward, or in an app, but it’s been a useful exercise to put into practice some of the things that have been covered on this course. The whole design comes down to a bunch of ZStack() with offset() modifiers. It’s amazing what you can come up with in code, making it unnecessary to import a graphic image into the project.


