In this lesson of the CWC+ iOS Database course, Chris shows us how to set up our own custom log-in & create user forms to use with Firebase Auth.
Creating our own forms eliminates one of the issues I highlighted in the previous post in that we’re not reliant on FirebaseEmailAuthUI so we don’t get the warning, re:
'archivedDataWithRootObject:' is deprecated
The primary difference between the “drop-in” method and our own custom method is in the LoginForm.swift file which, this time, reads something like this:
import SwiftUI
import FirebaseAuth

struct LoginForm: View {

    @Binding var formShowing: Bool
    @State private var email: String = ""
    @State private var password: String = ""
    @State private var errorMessage: String?

    var body: some View {
        NavigationView {
            Form {
                Section {
                    TextField("Email", text: $email)
                    SecureField("Password", text: $password)
                }
                if errorMessage != nil {
                    Section {
                        Text(errorMessage!)
                    }
                }
                Button {
                    signIn()
                } label: {
                    HStack {
                        Spacer()
                        Text("Sign in")
                        Spacer()
                    }
                }
            }
            .navigationBarTitle("Sign In")
        }
    }

    func signIn() {
        Auth.auth().signIn(withEmail: email, password: password) { result, error in
            DispatchQueue.main.async {
                if error == nil {
                    formShowing = false
                }
                else {
                    errorMessage = error!.localizedDescription
                }
            }
        }
    }
}
We also need to have a Create New Account form but, because we’re still using Firebase, it’s basically very similar to the LoginForm except that, instead of calling this:
Auth.auth().signIn(withEmail: email, password: password) { ... }we call this:
Auth.auth().createUser(withEmail: email, password: password) { ... }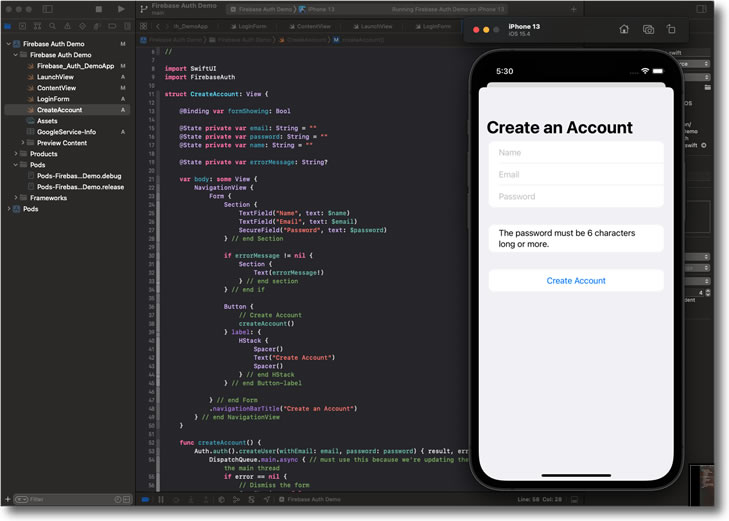
Having created our forms ourselves we are at liberty to style them as we see fit, using all the methods we’ve learned so far.


