
It can be somewhat disillusioning when you need to have a “stop-start” approach this early in a course.
This time around it’s because of how Firebase seems to have changed since the tutorial video. Micah makes it seem so easy as he whizzes through the steps required, but the changes means I’m constantly stopping the video and trying to find a way to do what he’s doing so I can get back on the same page as him. Not a nice feeling for a newbie.
One of the main obstacles here is this:
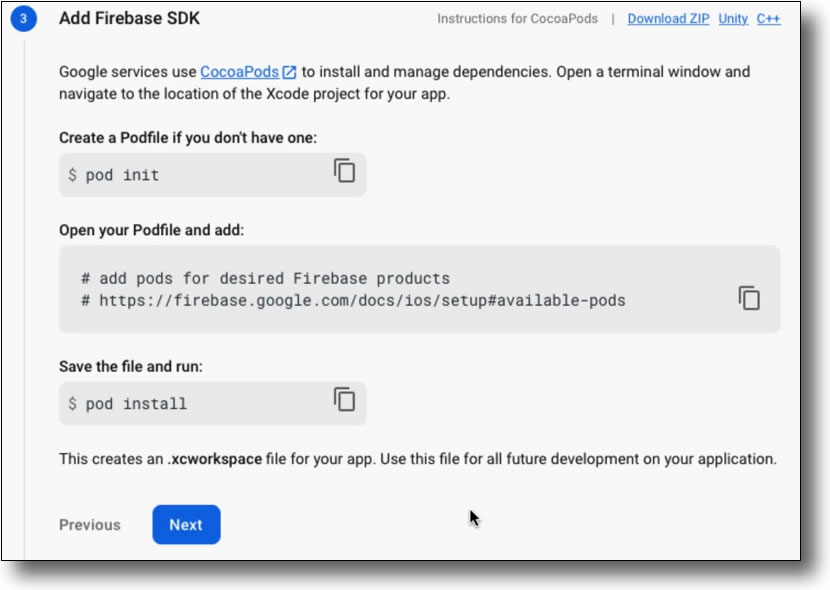

It would appear, to my newbie eyes, that Google used to rely on CocoaPods to manage Firebase dependencies and, indeed, that’s what Chris has been showing us up to this point. But now, in 2022, it looks like Google prefers us to use “Swift Package Manager” instead.
As the tutorial doesn’t use “Swift Package Manager”, it’s not a path I’m comfortable with going down even though part of me says that this will become a necessity going forward.
Anyway, it appears that you can click where it says “CocoaPods” at the top-right of this step and this take us to a page reminiscent (but not the same) as the one that Micah sees. Now we can, pretty much, get in line with Micah and follow his instructions again.
The app that Micah uses to edit the Podfile enables him to just type code Podfile into the Terminal, but that just gives me:
-bash: code: command not foundAs a relative newbie on the Mac (which I use because Xcode demands it), I don’t know any other text editor commands to use here but, by going back to seeing what Chris did previously, it’s not necessary to remain in the Terminal to do this. We can just open the Podfile from Finder in the normal way.
First, we add out dependecy, in this case Cloud Firestore:
# Uncomment the next line to define a global platform for your project
# platform :ios, '9.0'

target 'Firebase Demo' do
  # Comment the next line if you don't want to use dynamic frameworks
  use_frameworks!

  # Pods for Firebase Demo

pod 'Firebase/Firestore'

end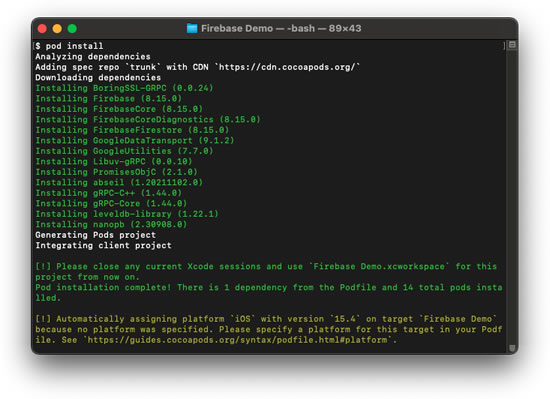
On closing the Podfile, we can now get back to the Terminal and run:
$ pod installIt took about 15 minutes or so for my old Mac mini to finish downloading the relevant dependencies (sufficient time for me to write up this blog post!) but, it got there in the end.
The next step is to add the initialisation code to our project. Google helpfully gives us a bunch of Swift code to add to our AppDelegate class. Turns out that’s no so helpful. Micah informs us that, with Swift UI, we don’t need most of that.
We just need to add import Firebase to our SwiftUI App file, and then add the following in the struct:
init() {
    FirebaseApp.configure()
}
The highlighted line is the only one we require from the code provided by Google.
Following this, we build the app to check for any issues.
Oh boy!
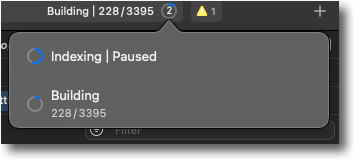
With over 3,300 “things” to build (whatever those “things” are), my Mac mini is giving me another time out. At least I’m not getting behind with updating this blog.
Interestingly, Micah’s Xcode shows a whole lot of errors and warnings in his build that we don’t see. This is probably because, as he explains, Xcode changed its requirements for third parties that hadn’t yet been changed in Firebase and, by today, this has been done so we’re not seeing a whole bunch of scary errors. Thank goodness there’s some advantage to doing things with newer versions.
Okay, so the Build has finally “succeeded” on my Xcode – I pray that I don’t have to wait this long every time I need to run the simulator or do a Build when I’m coding. This would be interminable.
Lesson 3 concludes with a ‘challenge’ which is to set up a new Xcode project and set it up in the way we’ve just gone through in the video. As I’ve done this while following the video, I’ll be moving on.
This has been a somewhat scary lesson, but it all worked out okay in the end.


